


Fire Door Lipping Damage — Diagnostic Hub
This hub helps you move from the defect you have observed to the most relevant Proudman diagnostic answer. Start by identifying exactly where the damage is, what it looks like, and whether there is evidence of impact, abrasion, moisture, rubbing, previous trimming or a failed repair. The appearance of damage is evidence to record, not proof of its cause.
Choose your diagnostic path
Start with what you have observed or what you need to do. Follow the closest path to the specific FIX answer. Record the defect and its location before deciding what caused it; a visible mark is evidence, not proof of cause.
1. Diagnose the damage
Loose, split, detached or crushed lipping; exposed core; damage significance and possible causes. Inspect loose or damaged lipping · Assess whether damage is significant · Investigate edge damage · Assess leaf damage before repair.
2. Repair and replace lipping
For fitting new lipping, repairing splits or replacing a damaged section, first identify the door and establish what repair method is supported by the relevant product evidence. A joinery repair that is physically possible is not automatically an approved repair. The practical fitting guide is being developed from the Proudman master material; until it is published, use the diagnostic answers above and do not assume generic adhesives, fillers or timber inserts are suitable for every leaf.
3. Trimming, routing and binding
Before cutting, routing or planing, identify the door, establish why material appears to need removing and check the permitted alteration evidence. Investigate contact before changing the leaf. Checks before cutting or routing · Proud replacement lipping and binding · Using rubbing marks as evidence.
4. Diagnose by damage location
Choose the exact area: bottom end of a vertical side lipping; top end of a side lipping; hinge-side edge; latch-side edge; horizontal head; bottom edge; corner; or damage around a lock, latch, flush bolt or hinge. These locations have different possible mechanisms. Inspect adjacent hardware, the frame, core, seals, floor or threshold and signs of moisture where relevant. The full location-specific checks are being mapped from the Proudman diagnostic master; do not assume the visible edge construction is universal.
5. Repairability and verification
Before selecting a remedy, separate what you can see from the cause you suspect. Record the product identity, damage location and extent, photographs, exposed or fractured core, previous trimming or repair, adjacent hardware and seals, and the evidence consulted. If the door or permitted repair method cannot be verified, stop before making an alteration and seek appropriate technical guidance. After any supported repair, verify the bond, edge condition, clearances, seals and operation as applicable, and record the outcome.
Direct FIX answers
- Loose, detached or split lipping — inspect the bond, split direction, joints and ends, and whether the damage extends into the leaf.
- When is lipping damage significant? — assess the position, depth and extent of the defect and what material or construction it exposes.
- Why has the edge of a fire door been damaged? — consider impact, trolley abrasion, handling, forced movement, repeated contact and earlier alterations.
- What do fire-door rubbing marks tell you? — use witness evidence to locate contact, then investigate the cause.
- Assessing leaf damage before repair — establish whether damage is confined to the lipping or extends into the core.
- Checks before cutting or routing a fire door — verify product identity, construction and permitted alterations before removing material.
- Replacement lipping that stands proud and causes binding — check projection and contact evidence alongside frame, hinge, stop, seal and clearance conditions.
- Damage during handling and installation — investigate impact, crushed corners, dragging and handling damage.
Find the answer by location
Choose the closest location: bottom end of a vertical side lipping; top end of a side lipping; hinge-side edge; latch-side edge; head edge; bottom edge; corner; or damage around a lock, latch, bolt or hinge. Location narrows the possibilities but does not confirm the cause. Check nearby hardware, the frame, seals, clearances and signs of moisture or previous work where relevant.
Repairing or replacing lipping
If you are considering how to replace fire-door lipping, repair a split, bond a loose section or insert replacement timber, first establish the original leaf construction and the evidence supporting the proposed method. A repair that is physically possible is not automatically an approved or compliant repair. Do not assume generic adhesive, filler, sealant or replacement timber restores the original fire performance. Use the relevant manufacturer instructions, certification or applicable repair evidence. If the door cannot be identified or the method cannot be verified, record that limitation and seek appropriate technical guidance.
What to record before choosing an answer
- Door reference, manufacturer and product identification where available.
- Exact location and pattern, with overall and close-up photographs.
- Approximate length, width and depth where assessable without further damage.
- Whether lipping is split, loose, detached, crushed, missing or standing proud.
- Whether core or internal layers are exposed or fractured.
- Signs of impact, abrasion, rubbing, moisture, previous trimming or repair.
- Condition of nearby seals, hardware, hinges, frame and clearances where relevant.
- What has been observed, what cause is only suspected, and what further check is needed.
Use the spoke links above to open the specific diagnostic answer. Each answer should address its own question and link back to this hub.
Damage to the edge of a fire door leaf can affect more than its appearance. Split or detached lipping, crushed corners, exposed core material and unauthorised trimming can raise questions about the door’s integrity and suitability for continued use. Record what has happened, establish the extent of the damage and assess the available evidence before deciding on remedial action.
1. What is fire door leaf edge damage?
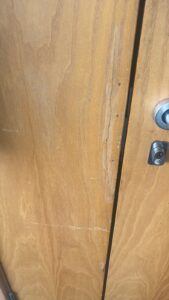
Fire-door leaf edge damage affects the perimeter of the leaf. It may involve timber lipping, facing material, internal core, edge seals or areas around hardware cut-outs. Examples include split or cracked lipping; loose or detached lipping; crushed corners; impact damage; exposed core; gaps between lipping and leaf; damaged or displaced seals; excessive trimming; damage around hinges, locks or latches; and moisture-related swelling or delamination. Damage alone does not establish failure: significance depends on location, depth, extent and cause, together with evidence for the particular doorset.
2. Start by recording the damage
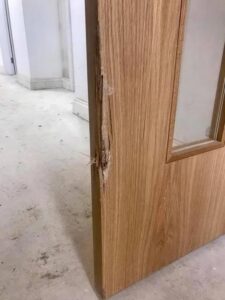
Record the building, floor, room or door reference; leaf and doorset identification; exact location; approximate dimensions; whether lipping is split, loose, detached, crushed or missing; whether core is exposed; nearby seal condition; signs of moisture, impact, previous repair or trimming; photographs and measurements; and the recommended next step with its reason. Take an overall photograph and close-ups, with a scale where useful. A close-up alone may not show where the defect sits on the door.
3. Understand the door’s edge construction
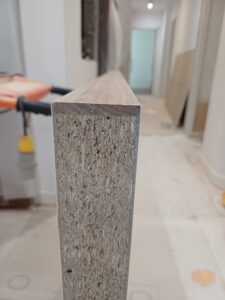
Timber fire-door construction varies by manufacturer and product. A leaf may incorporate a core, facings, specified lipping and intumescent protection, but materials, dimensions and arrangement depend on the design. Establish manufacturer and product identification, rating and product documentation, tested or certified construction details where available, specified lipping material and dimensions, permitted trimming allowances, edge-seal arrangement, and installation or maintenance instructions. Do not assume doors of the same nominal rating have identical construction. If the product cannot be identified, record that limitation.
4. Split, loose, detached or crushed lipping
Lipping may split along the grain, across its width or from an impact point. Record direction, length and approximate depth; check whether the split is confined to the lipping or extends into the leaf. If loose, record the affected length and any displacement. Do not force it back or assume adhesive alone is an acceptable repair. If detached or missing, record exposed material. Impact can crush or fracture lipping, especially near corners or hardware, and visible damage may not show its full extent.
5. Damage to the head and bottom edges
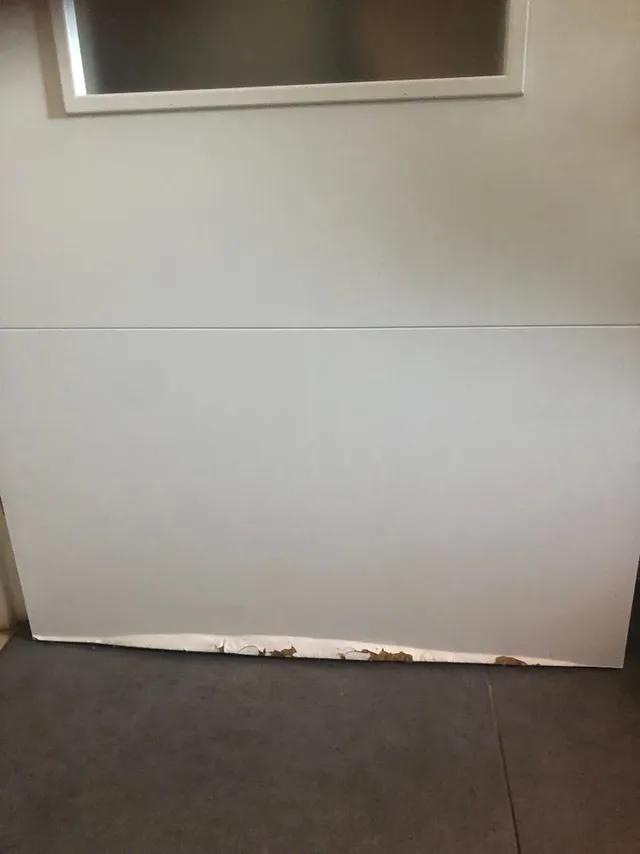
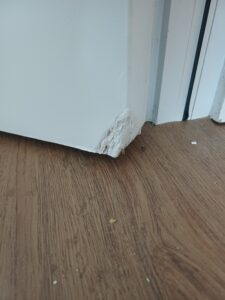
Where accessible and within the inspection scope, check top and bottom edges for split or damaged lipping, excessive trimming, exposed core, swelling or deterioration, damaged edge protection and previous repairs. Do not remove a leaf or carry out intrusive inspection unless authorised and appropriate. If an edge cannot be inspected adequately, record that limitation.
6. Excessive trimming and alterations

Trimming can change a tested door construction and may affect dimensions, edge construction, clearances, seals or other features. Establish which edges have been altered, the approximate amount removed where measurable, whether original lipping remains intact, whether core is exposed and whether the remaining construction can be checked against manufacturer instructions. Do not assume a small alteration is acceptable because the door still operates. Confirm any permitted allowance for the specific product.
7. Exposed core material
Record the position and extent of exposed core and photograph it clearly. Note the material only if it can be identified reliably; do not identify it by colour alone. Exposed material does not by itself prove the exact remaining fire-resistance performance. Covering it with filler, sealant or paint does not establish that performance has been restored. The response depends on original construction, extent of damage and evidence supporting a repair method.
8. Splits extending into the door leaf
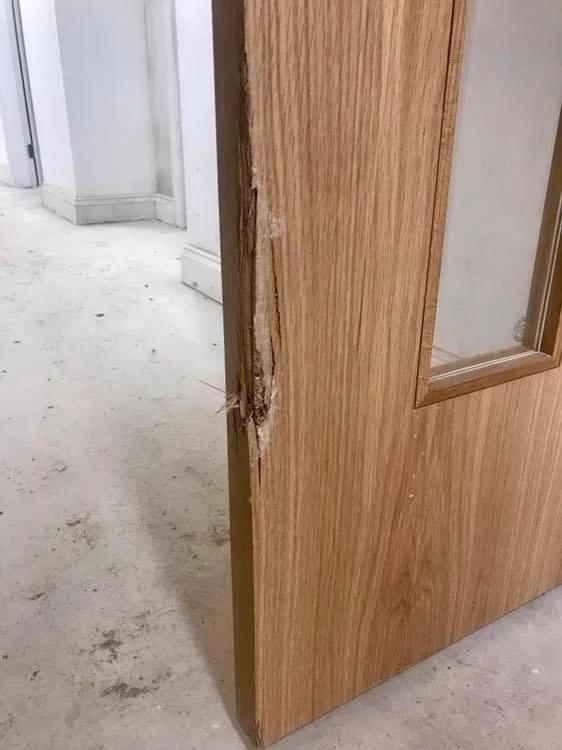
A split extending beyond the lipping into the body of the leaf needs particular attention. Record its direction, length, apparent depth and whether internal layers are exposed. Do not assume bonding or filling the visible split restores the original construction; establish product details and supporting repair evidence first.
9. Damage around hinges, locks and latches
Inspect lipping together with the hardware preparation. Check for impact, splits, over-deep or misplaced recesses, loose fixings, repeated machining and damage extending into the core. A hardware fault alone does not establish that the leaf must be replaced, but repairs must be supported by evidence for the particular product.
10. Moisture and swelling
Look for swelling, softening, splitting, staining, delamination or exposed core, particularly where water may reach head or bottom edges. Record whether moisture appears active or historical and investigate its source where possible. Repairing the visible edge without addressing ongoing moisture may not resolve the underlying cause. Construction and permitted repair methods vary by product.
11. Rubbing, binding and contact marks
Paint loss, stains, transferred material, polished areas or rubbed-off lacquer can help locate contact. They do not alone prove why contact occurs. Check the leaf, frame, hinges, stop-lath geometry, seals, floor or threshold and recorded clearances as appropriate. Establish whether the leaf is distorted, the frame has moved, hardware has shifted or a previous lipping replacement projects beyond the intended face.
12. Assessing repair options
Separate the observed defect from the suspected cause and proposed remedy. A repair may be physically possible but unsupported for the particular doorset. Check manufacturer instructions, certification and applicable repair evidence. Do not assume generic adhesive, filler, sealant or replacement timber is acceptable for every fire door. If the product or repair method cannot be verified, record the uncertainty and seek appropriate technical guidance.
13. Inspection record and next decision
Record door identity, defect location, photographs, measurements, lipping bond and core condition, signs of impact, abrasion, moisture or contact, previous trimming or repair, nearby seals and hardware, evidence consulted and unresolved uncertainty. Decide what further check is required and whether a supported repair route can be established. Do not confuse an observation with a confirmed cause.
Related diagnostic answers: return to the Fire Door Lipping Damage — Diagnostic Hub to select a specific FIX answer.